Radium Engineering Air Oil Separator (AOS-R) Kit 15-21 Subaru WRX
Part Number: 20-0258-00
Description: AOS Kit; Includes 20-0255
Fitment: 15-21 Subaru WRX 2.0T
Details:
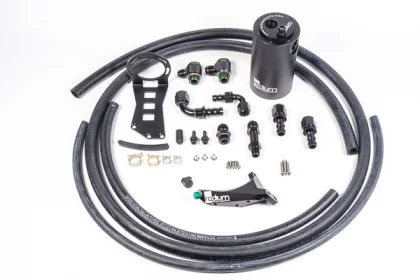
High-powered modified Subaru engines tend to generate excessive blow-by oil and gasses. In these cases, an ordinary small catch can may quickly fill with oil and not be adequate. Like the Radium Engineering Subaru Dual Catch Can Kit, the AOS (Air Oil Separator) kit is responsible for keeping blow-by oil and other pollutants out of the intake pipe, manifold, turbocharger, and intercooler during all engine loads. The main difference is that an AOS system returns what is collected back into the oil pan so there is no servicing required. The built-in heater keeps water from condensing in the AOS. And because water is more dense than oil, there is an integrated water trap found around the bottom perimeter of the can. This prevents water from descending into the oil pan if ever present. Furthermore, because the water is trapped against the heater, it will eventually boil and evaporate out of the system.
CLICK HERE for a more in-depth look at the Subaru AOS as shown for the EJ engines, same theories apply for this application. However, the direct-injected Subaru FA20F engine in particular has an inherent problem since there are no port injectors to clean the backside of the intake valves.
The AOS is constructed of CNC machined sections that screw together and are sealed with O-rings. The AOS can be completely disassembled for cleaning or servicing.
Benefits
-Effectively raises the fuel octane and increases engine performance with cleaner inlet air
-Prevents oil buildup in the intake or intercooler system walls, throttle body, intake manifold, etc.
-Lowers hydrocarbon emissions